Are you a beginner food blogger eager to improve the quality of your food images? Or just want to boost your Instagram profile with a couple of yummy pictures? Then, you’ll want to check out some simple tips that will help you become an expert food photographer.
And for your recipes to look even more stunning, tap into the power of an online recipe cards maker. This tool will help you create thumb-stopping recipe cards in the blink of an eye and share them on your favorite social media platforms.
Understand directional light
When it comes to food photography, light is the most important determinant of whether your food photos are beautiful or mediocre. So, it’s critical for the success of your photos that you understand how light works. Understanding directional light is just one step in this direction.
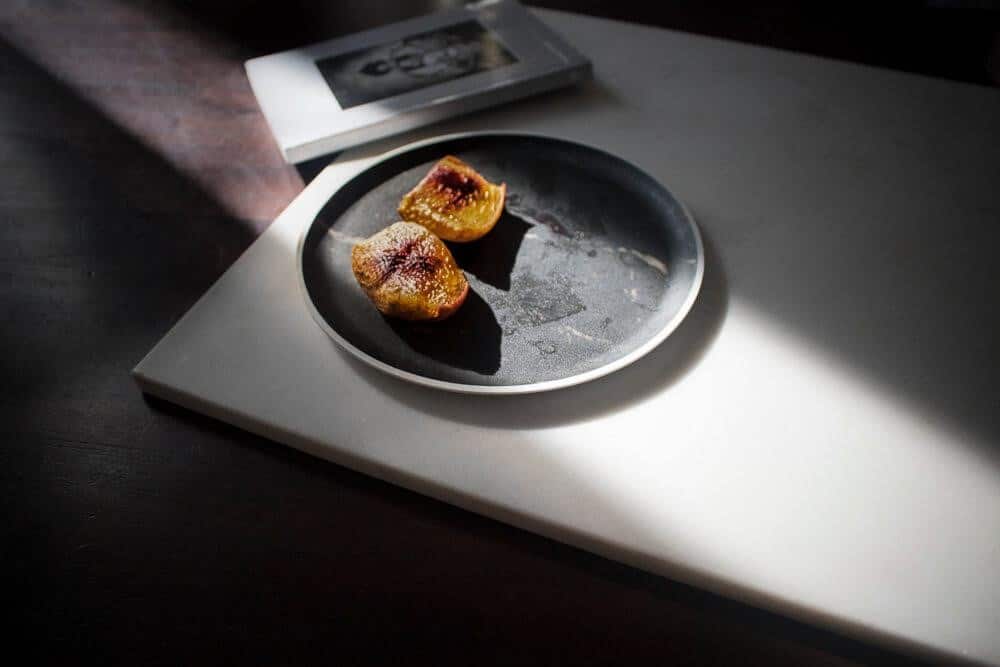
Directional light comes exclusively or mostly exclusively from one single direction. And when your food is illuminated by light from just one direction, as opposed to multiple directions, it will look much better. So, which direction to choose?
First, there is a sidelight, and that’s when the scene or your food is illuminated from either the left or the right side. There’s also a backlight where the scene is illuminated from behind. And finally, you can take photos of your food in situations where the scene is illuminated from the front.
Most experienced food photographers recommend that you refrain from shooting with front light since it tends to make your gastronomic masterpieces boring and colorless. So, you want to stick with side and backlight to make your photos look more visually appealing.
With sidelight, you’re going to get images that feel balanced, even, and overall beautiful. It’s universally flattering for any kind of food and your photography setup. Sidelight is particularly useful when you want to shoot food that has a lot of height to it or a lot of different layers you want to show off.
Backlight usually looks more dramatic. Oftentimes, photos with this type of lighting have more contrast and darker shadows, and highlights. They tend to feel more glowy, ethereal, and, perhaps, even moodier. That being said, the backlight is the best option when the surface of your food has a lot of textural details that you wish to accentuate.
Manage your light source
As you now see, light is one of the most important factors to eye-catching food photos. But it’s also equally important to learn how to masterfully manage the source of your light.
For backlight images, you want to diffuse your image. You can do this by putting a semi-transparent white surface right in front of your light surface. Lots of food bloggers now use professional softbox lighting to create soft and diffused light.
This method can go a long way in helping you get rid of dark shadows and blown-out highlights on your foods. You also would be well advised to take a photo of your food before and after the diffusion. By doing so, you’ll be able to compare and appreciate the difference.
Another part of managing your light source is being consistent with the light source you’re using. When you have an excess amount of light or you’re shooting in a room with a lot of windows and there’s light coming from different directions, you can end up with images that look flat and insipid. If you want to give your food more dimension, intrigue, and depth, you’ll be better off blocking out the superfluous light. You can use black curtains or black foam boards which can be found on Amazon or any photography store.

Another trick to managing your light source is to simply make a gap through which the light is coming smaller. Thus, if you want to take a shot of a bowl of apples right in front of your kitchen window, there is no need to block out the source of light completely.
You can close the curtains in front of the window just to the point the bowl is sitting in that little sliver of light right in between the curtains. Alternatively, you can use shutters and let the light and shadows play on your fruit.
I hope, these simple recommendations will help you master the art of food photography and get the recognition you deserve.

